1. System Setup
1.1. System requirements
Platform
- Windows, Linux, MAC or any platform which can run Java 8 or above.
JDK
- Artos can be integrated with any Java project compiled with JDK 8U45 or higher.
1.2. Add Artos Jar as a dependency
Non-Maven Projects
- Download latest Artos jar from the location - Artos_Maven_Repository.
- Add jar to project build path.
Maven Projects
- Copy latest jar dependency XML block from the location - Artos_Maven_Repository.
- Add dependency to project pom.xml file
1
2
3
4
5
6
<!-- Example dependency block -->
<dependency>
    <groupId>com.theartos</groupId>
    <artifactId>artos</artifactId>
    <version>x.x.xx</version>
</dependency>
1.3. Eclipse IDE
1.3.1. Install ANSI plug-in for Linux OS
- Go to Eclipse SDK => Help => Eclipse Marketplace.
- Find “ANSI escape in console” plug-in.
- Install the plug-in.
- Restart Eclipse SDK.
1.3.2. Configure test templates:
The use of a Java template avoids typing error and increase test development speed. Once imported, templates can be edited to suit business needs.
Import default templates:
Download template.xml file from location : Artos_Eclipse_Template .
In Eclipse IDE, browse to Window => Preferences => Java => Editor => Templates.
Click on Import button.
Import downloaded template.xml file.
Following templates will be added
- Artos_Runner
- Artos_TestCase
- Artos_BDD
1.3.3. Use template:
Create a new Java class.
Select and delete all the content of the class.
Type art and press CTRL + SPACE.
Template suggestion (IntelliSense) list will appear as shown below.
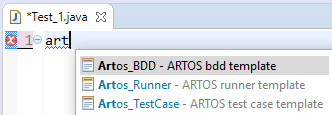
Select desired template.
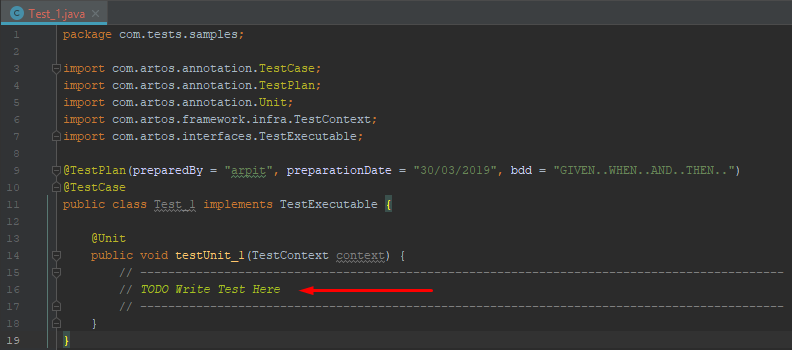
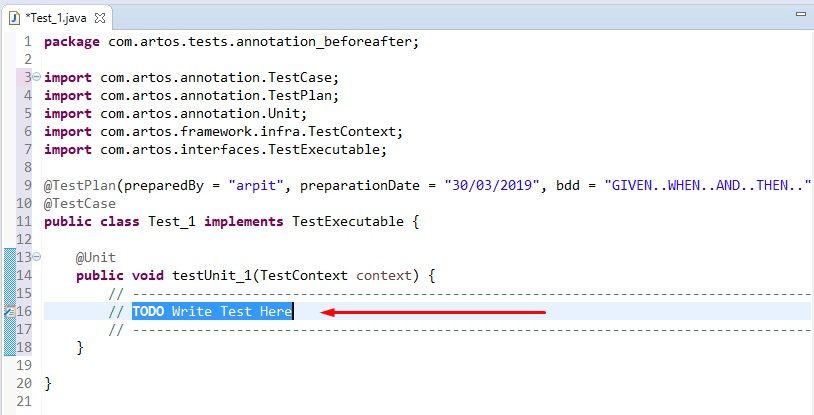
Skeleton code will be added to the class.
Write BDD test plan inside
`bdd`attribute under`@TestPlan`annotation.Start writing test logic between two green lines.
1.4. IntelliJ IDE
The use of a Java template avoids typing error and increase test development speed. Once imported, templates can be edited to suit business needs.
1.4.1. Configure test templates:
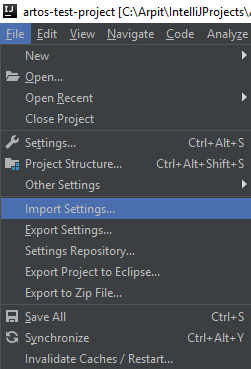
Download IntelliJ_template.zip file from location : Artos_IntelliJ_Template .
Browse to File => Import Settings.
Browse and import downloaded IntelliJ_template.zip file.
Select both of the checkboxes.
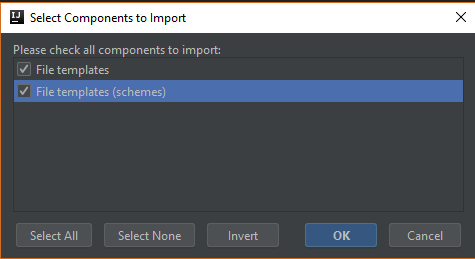
Following templates will be added
- ArtosRunner
- ArtosTestCase
1.4.2. Use template:
Right-click on the package.
Select new and choose the desired template.
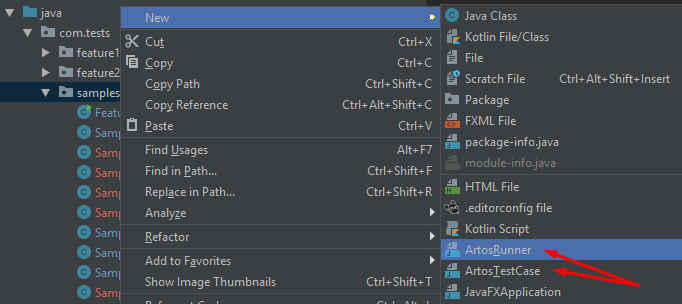
Provide a class name.
Skeleton code will be added to the class.
Write BDD test plan inside
bddattribute under@TestPlanannotation.Start writing test logic between two green lines.